CHOCOLATE LAMINGTONS
WITH RASPBERRY CREAM FILLING

VANILLA SPONGE INGREDIENTS
225g (1 cup) castor sugar
135g (9 1/2 tbsp) butter, room temperature
1 tsp vanilla extract
177g (3 large) eggs
218g (1 3/4 cup) flour
8g (2 tsp) baking powder
48g (4 tbsp) milk
CHOCOLATE ICING
440g (3 1/2 cup) icing sugar
30g (1/4 cup) dutch cocoa powder *
125ml – 250 ml (1/2 – 1 cup) hot water
20g (1 tbsp) butter, softened
TO ASSEMBLE
3-4 cups desiccated coconut
Raspberry Cream (optional) –
1 cup cream
1/4 cup raspberry jam
METHOD
![]()
1. Preheat oven to 175C (350F). Line a 20cm x 30cm (8×12 inch) baking tin with baking paper, leaving a 2cm overhang on all sides.
2. Place butter in a medium bowl and beat for 30 seconds with an electric hand/stand mixer.
3. Gradually add sugar on a low speed until the mixture is light and fluffy and has a mousse-like texture.
4. Whisk eggs in a small bowl with vanilla extract. With the mixer on low, slowly add the eggs and vanilla to the creamed butter and sugar, ensuring that it is all combined evenly.
5. Sift and whisk flour and baking powder together in a small bowl. Add half of the flour to the creamed mixture then fold it through to just combine. Add half the milk to the mixture, and fold to combine. Repeat this process with the remaining flour and milk, folding gently until the mixture is well combined (alternating the liquid and flour in this way prevents too much gluten from forming, ensuring a light and fluffy texture).
6. Spoon the mixture into prepared tin. It will seem like there is not enough mixture at first, but there is (don’t worry). Smooth out the mixture so that it is evenly distributed in the tin.
7. Bake for 20-25 minutes or until golden brown on the top, the edges of the cake pull away from the sides of the tin and/or a skewer comes out clean when inserted.
8. Let the sponge cool in the tin for 10 minutes before inverting onto a wire rack. Cool completely and trim the edges of the cake, then cut into squares (about 4-5cm).
Make Chocolate Icing
Sift the icing sugar and cocoa powder in a bowl. Mix through the butter and enough hot water until the consistency is smooth and there are no lumps. Add more water if it is too thick, or more icing sugar if it is too runny.
Raspberry Cream
Whip the cream until soft peaks form and stir through the raspberry jam.
To assemble
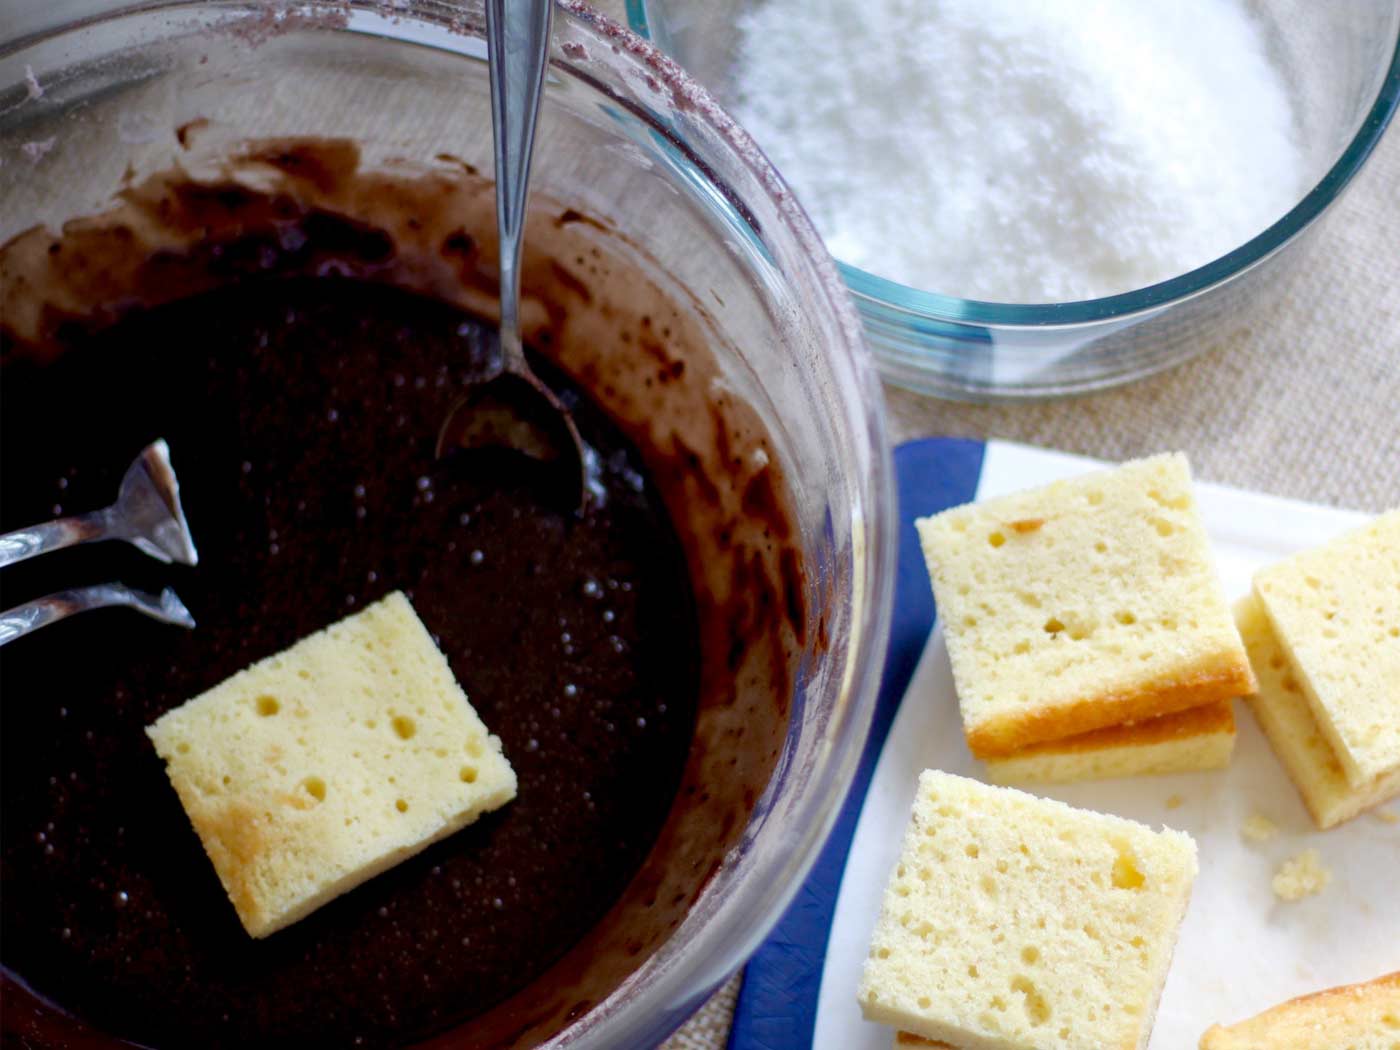
1. Set up a bowl with the chocolate icing, another bowl with the coconut and a wire rack with baking paper underneath (this catches the chocolate drips and excess coconut).
2. Using two forks, dip the sponge in the chocolate until well covered, drain excess, then roll in the coconut and sit on a wire rack to set. Repeat the process with all the sponge squares. Leave to set completely before serving (about 10 minutes).
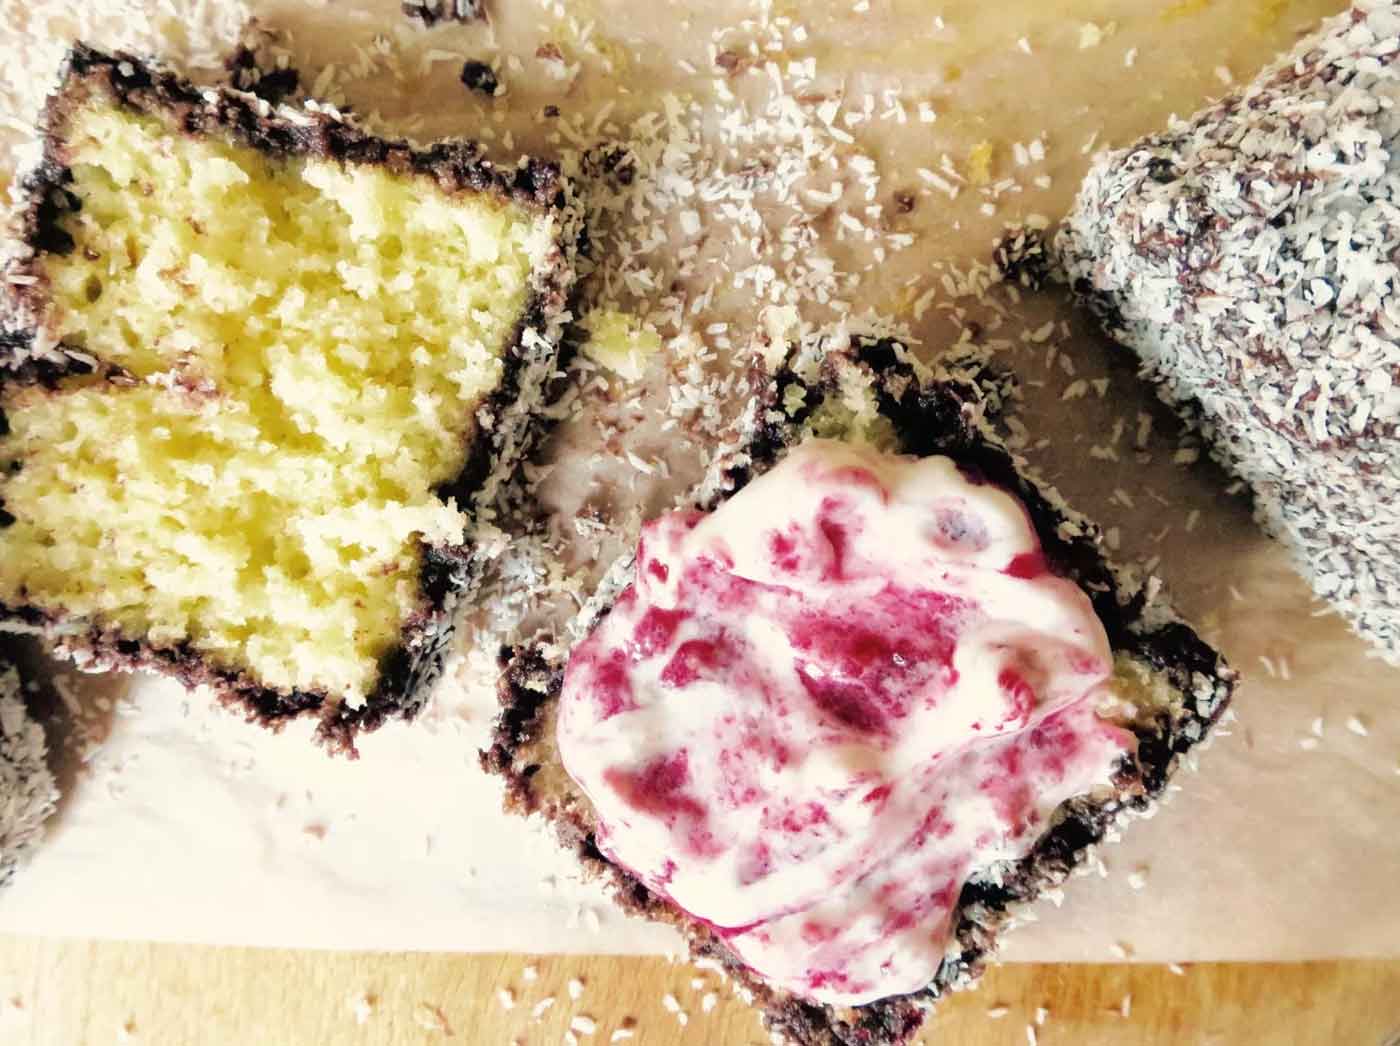
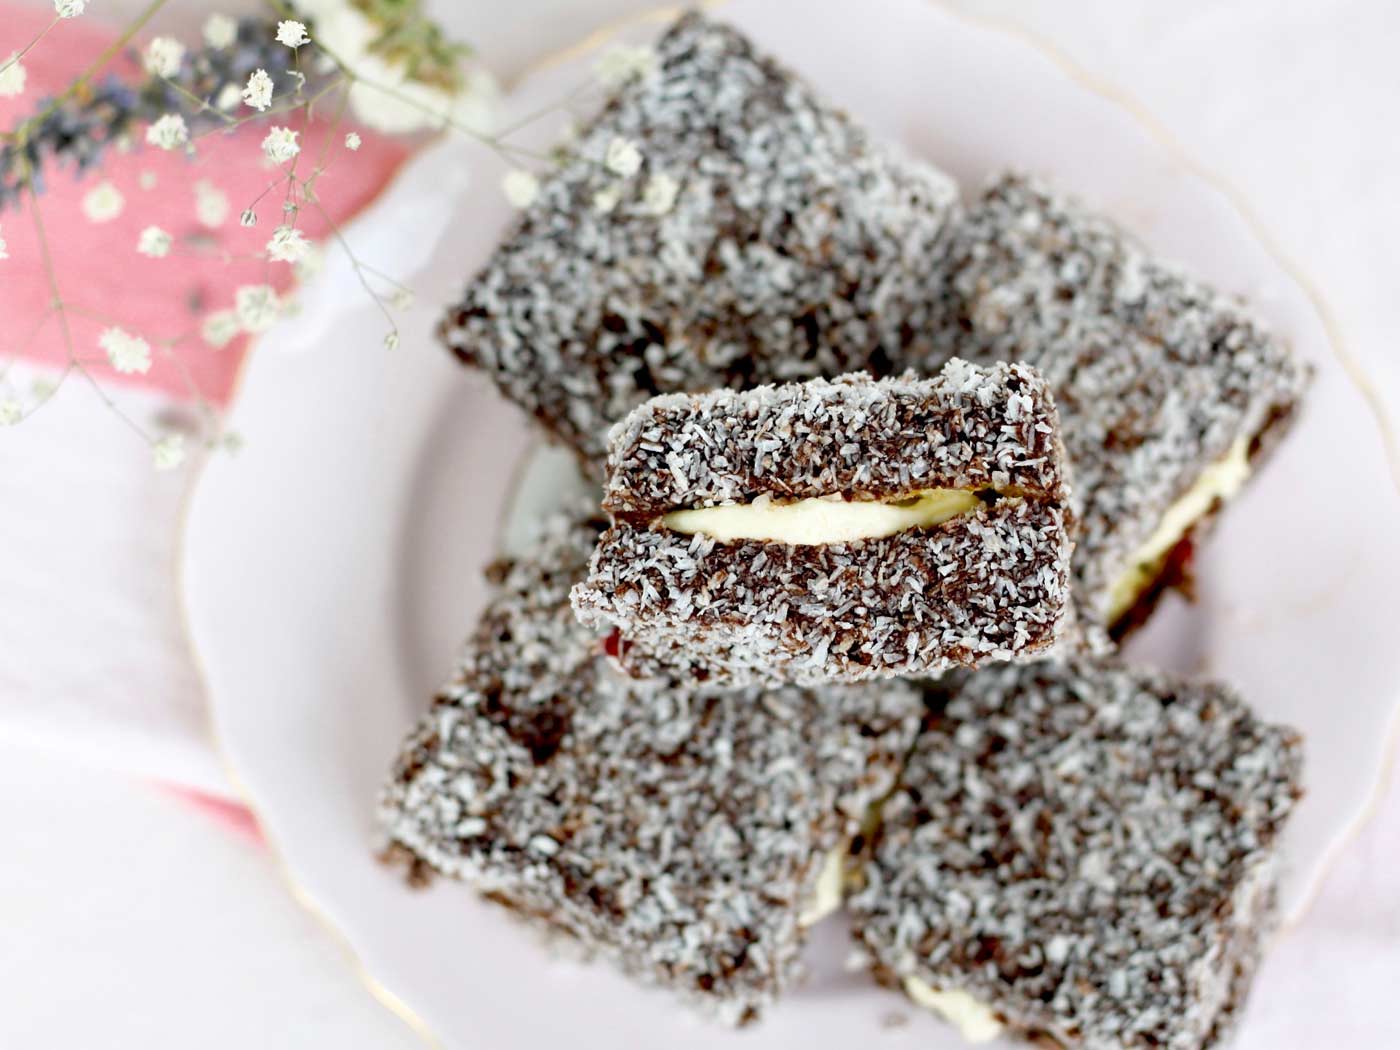
3. If desired, cut in half and fill with the raspberry cream filing.
These are best eaten on the day they are made but can be kept in the fridge for 2-3 days in an air tight container – if they last that long*
Notes
* Natural cocoa powder is also fine but I like dutch cocoa as it has a darker colour.
* When I make these, I usually only use half of baked sponge and freeze the second half for another day. Half a sponge makes 12 chocolate lamingtons.
* Prep time includes assembling 24 chocolate lamingtons
By Sarah Sears


PRO TIPS, TRICKS & EXTRAS

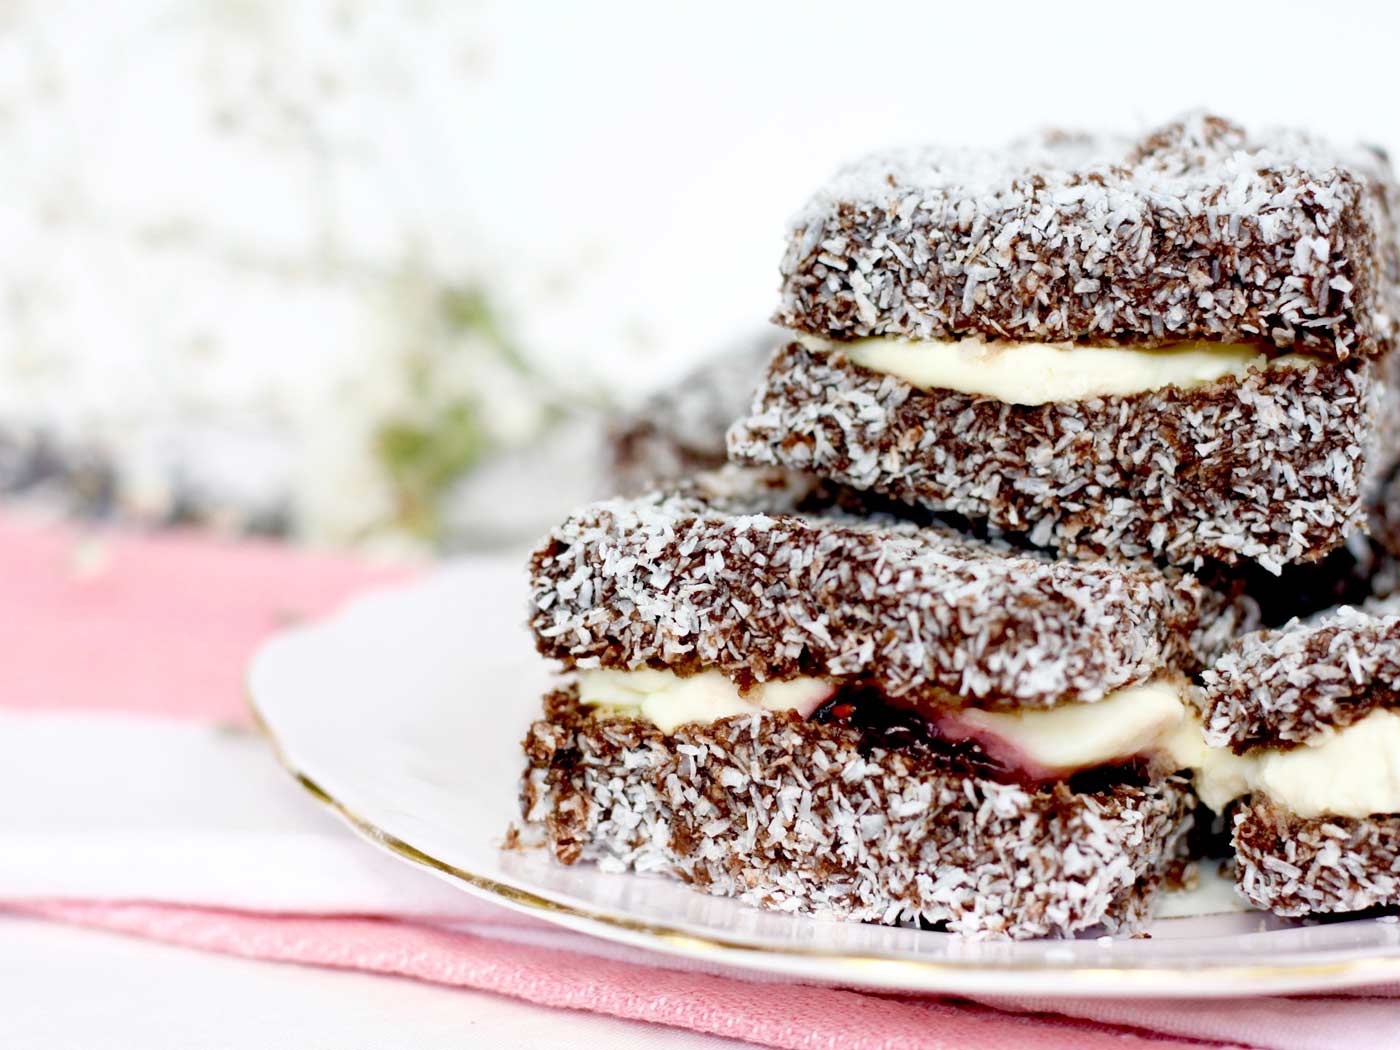
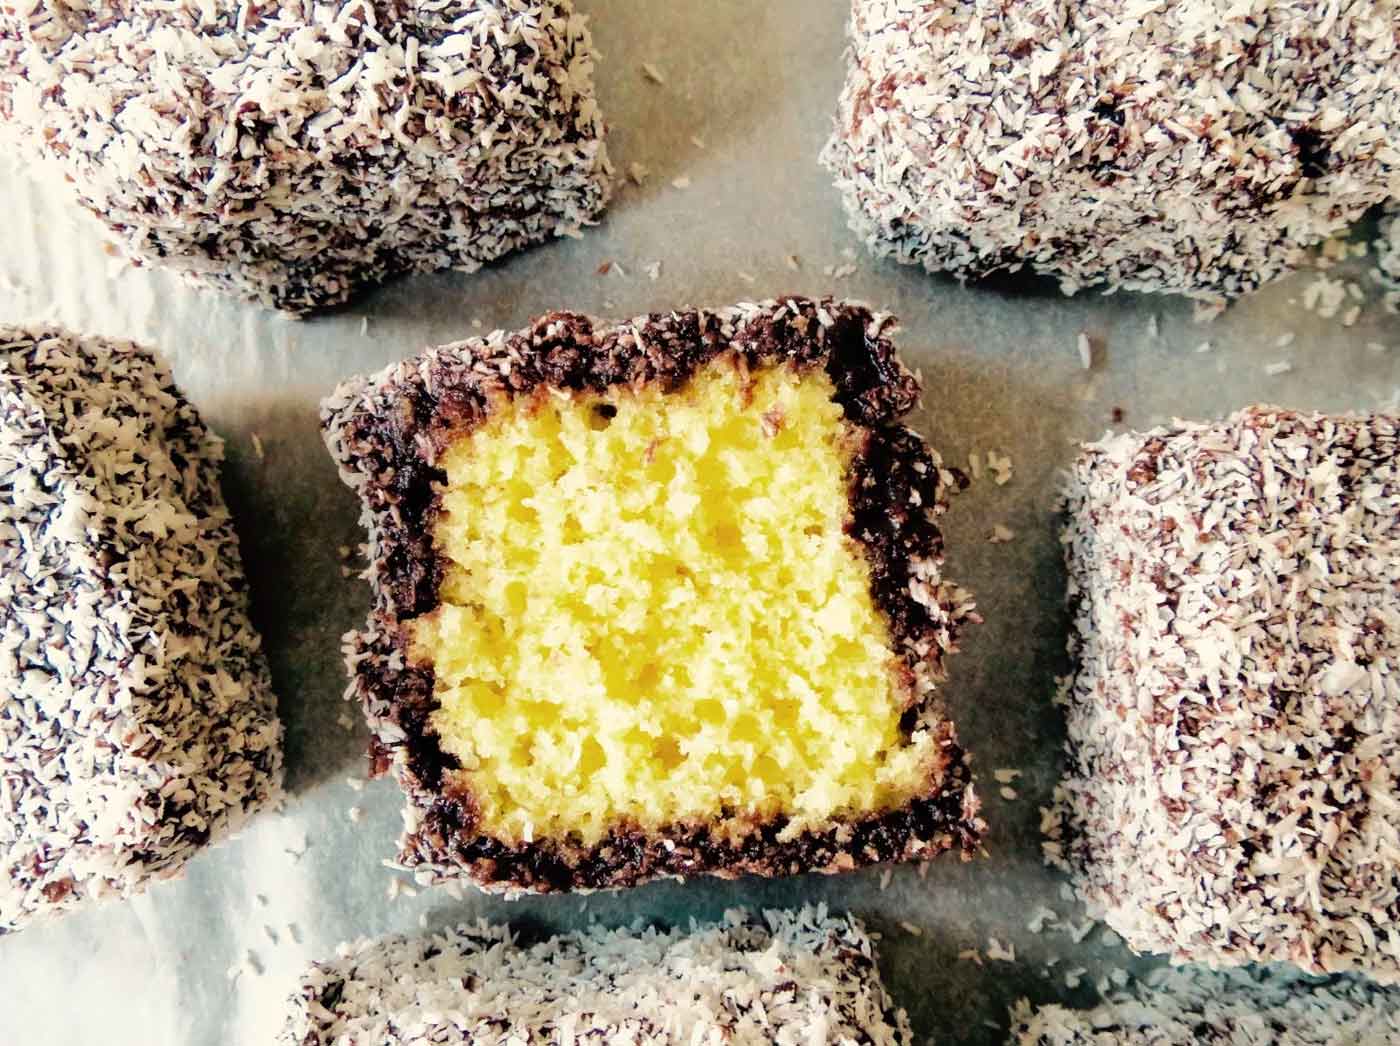
Little squares of vanilla sponge cake coated in chocolate icing, then rolled in dedicated coconut and filled with a delicious raspberry cream filling – the perfect Kiwi treat.
My-oh-my, these chocolate lamingtons are seriously addictive and if you’ve been searching for a true, classic New Zealand cake, then this is it. Kiwis (as well as a lot of Australian’s) have been serving these chocolate-coconut treats at parties, gatherings, cake stalls, fundraisers (you name it) for years and every Kiwi needs to have this recipe in their baking repertoire – everyone else should too.
Like the pavlova, Aussies and Kiwis have been in a long debate about who can claim the chocolate lamington recipe as their own – and for good reason too, it’s so delicious that it’s very worthy of name claim. However there is no wonder that there has been confusion as to where the chocolate lamington originated from. According to this article, lamingtons were known in New Zealand as a “Wellington”, which was created to “…imitate the snow capped mountains of New Zealand”. They were documented in New Zealand in 1865 which was several years before 1902 when the recipe was first documented in Australia. So according to this evidence (as well as other proof), it looks like the chocolate lamington was a New Zealand invention after all, sorry Aussies. Let’s not get started on the Pavlova…
Now that we have that cleared up, let’s get back to the heart of this scrummy dessert. In case you’re not familiar with it, let me describe it to you –
1. First we start with a vanilla sponge cake, which is usually baked in a rectangle or square shaped baking tin.
2. The sponge is cut into squares or rectangles and each piece is smothered in a chocolate sauce/icing so that every outer edge of sponge is covered in chocolate – it’s sounding pretty good, isn’t it?
3. Next, this chocolate covered sponge is coated in a layer of coconut and is left to set for a minutes before serving.
The best part about the chocolate sauce is that it seeps through the outer layers of the sponge, which is absorbed, creating not only an incredible flavour but also a super moist and wonderful texture.
My mouth is watering just thinking about it.
…and just when you think it can’t get any better, you can go above and beyond and serve it with jam, cream or both. I used a raspberry cream to sandwich these chocolate vanilla squares together but eating them plain is pretty darn good too.
As usual, here are a few baking secrets to help you create the best lamingtons possible:
- Follow the creaming method instructions for best results. I have used castor sugar which creates a lighter and better risen sponge than when using granulated – but granulated works too if you don’t have castor sugar.
- I have used large eggs so that they weigh approx. 177g. This is important as it measures in line with the rest of the ingredients. If you don’t have large eggs, simply whisk smaller eggs into a bowl and weigh them until you reach 177g (or close to) and discard/freeze the rest or use them in an omelette.
- Most lamington recipes will say to either leave the sponge for a day before using or to put it in the freezer before coating in chocolate. I have designed this recipe to be sturdier (without compromising on texture or flavour) to avoid having to do this.
- I use a 20cm x 30cm baking tin which (in my opinion) makes the perfect size lamingtons. The sponge looks thin when baked, but when it cut into squares, smothered in chocolate icing, then covered in coconut and filled with a raspberry cream, it’s just right. Using this size tin makes 24 chocolate lamingtons (about 4-5cm in size) but you can also bake it in a 20cm x 20cm for thicker and bigger lamingtons if preferred (just bake for a few minutes longer).
YOU MIGHT BE INTERESTED IN
![]()