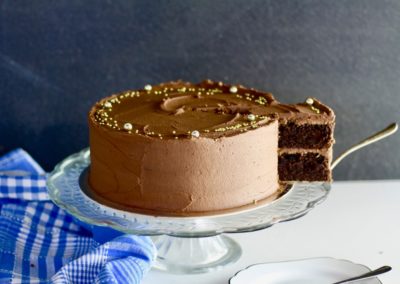
CHOCOLATE
LAYER CAKE
WITH PEANUT BUTTER BUTTERCREAM

CAKE INGREDIENTS
230g plain flour
53g natural cocoa powder
1 teaspoon baking powder
1/2 teaspoon baking soda
1/2 teaspoon salt
1/2 teaspoon espresso powder
140g butter
3 eggs
1 teaspoon vanilla extract
280g (about 250mls) buttermilk
185g light brown sugar
185g granulated sugar
PEANUT BUTTER CREAM
230g butter, softened
230g (1 cup) peanut butter, at room temperature
1 teaspoon vanilla extract
375g – 500g (3-4 cups) icing sugar
1/4 peanuts, chopped (optional)
METHOD
![]()
1. Preheat oven to 175C (350 F) and line one deep 7 inch cake tin.
2. In a medium sized bowl, sift together flour, cocoa powder, baking powder, baking soda, salt and coffee. Whisk well to combine and set aside.
3. In a large bowl, beat the butter until it is creamy using a hand/stand mixer. Gradually add the sugars and beat on low until the mixture is light, fluffy and has an almost mousse-like texture (the time it takes to do this will depend on your mixer).
4. Whisk eggs with extract in a small bowl and gradually add to the butter and sugar mixture, mixing until it is well combined. Be careful not to over-mix.
5. Add the flour mixture and buttermilk to the butter mixture, alternating between the two and starting and ending with the flour mixture. Mix to combine gently.
6. Pour mixture into prepared tin and bake for 1 hour, or until it is springy to the touch and a tooth pick (when inserted) comes out clean.
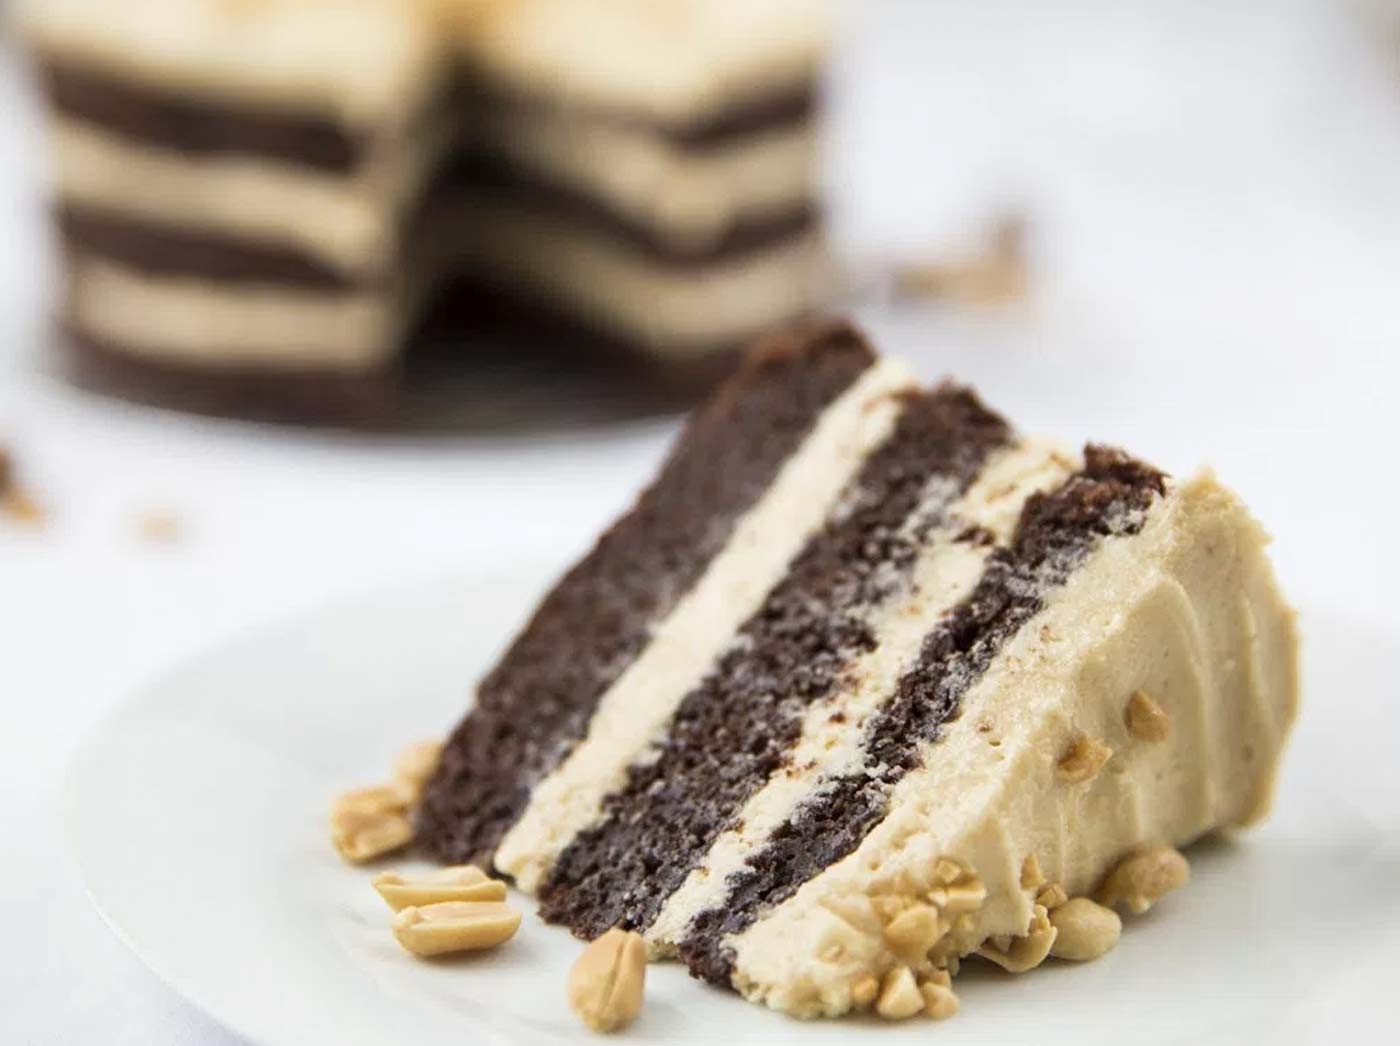
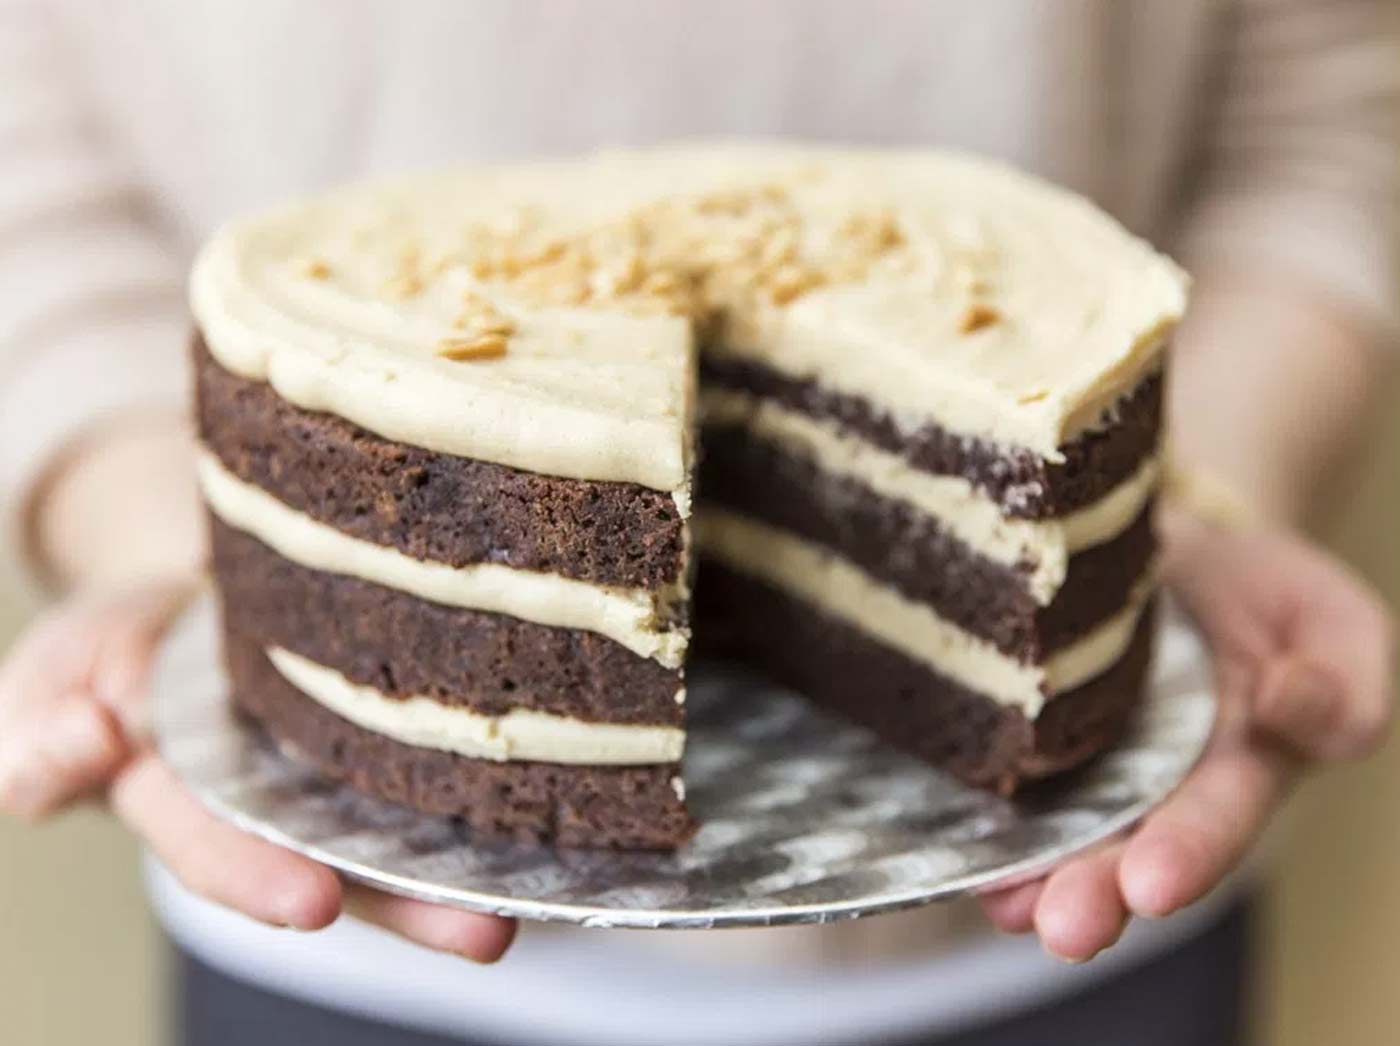
7. Leave the cake to cool for at least 15 minutes before inverting onto a cooling rack. Once completely cool, level the cake by cutting the top off and cut into layers.
8. To assemble, place one layer on a cake plate, cover with buttercream and top with another layer. Repeat this process with the third layer and top with more buttercream and any desired decorations.
To make Peanut Butter Buttercream
9. Cream butter with a hand/stand mixer until creamy. Add peanut butter and vanilla and mix until combined. Sift in icing sugar, 1 cup at a time and mix until it is light and fluffy and you have the desired consistency.
Notes
* This cake will keep well when stored in an air tight container for up to 4 days. Serve it at room temperature.
By Sarah Sears
Adapted from Joy The Baker

PRO TIPS, TRICKS & EXTRAS

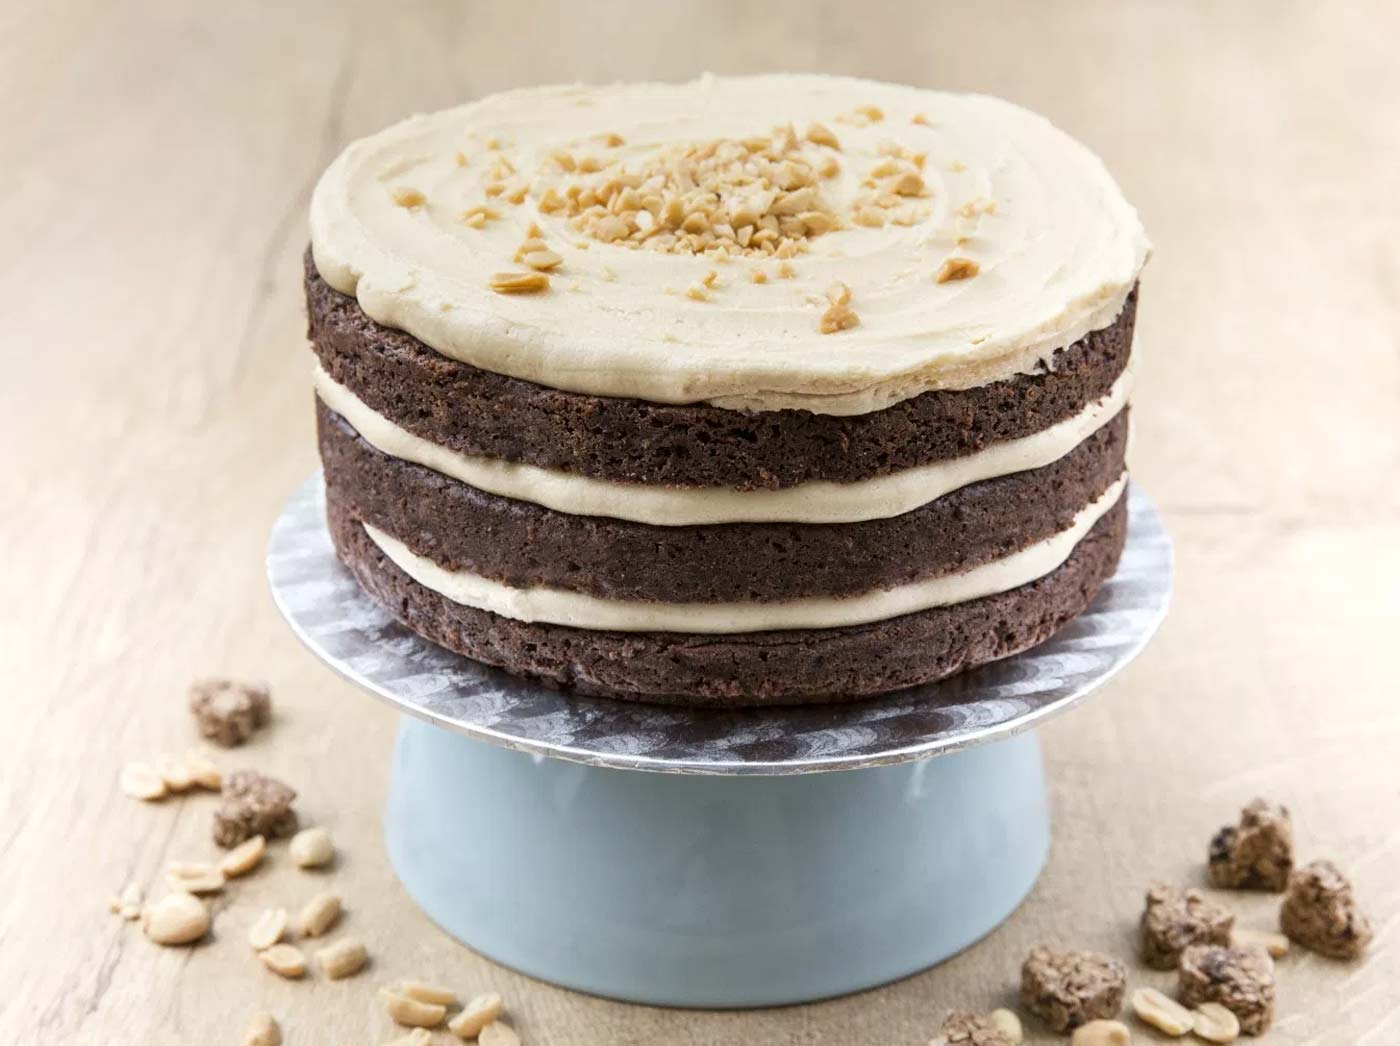
Reese’s peanut butter cups meets cake. It’s fudgy, decadent and you’ll want to eat every last crumb!
If you could choose just one ingredient that you couldn’t live without, what would it be (…it’s a hard question I know)? For me, it would be peanut butter. Not just any peanut butter mind you, but a really good quality one, made just from peanuts – no extra salt, no preservatives and no sugar. I like to eat it straight from the jar – don’t tell anyone.
Chocolate comes in at a (very) close second place. I usually prefer dark chocolate, but really anything goes – milk, bittersweet, white, flavoured…it’s all good.
So now that you know this about me, I’m sure you can imagine how obvious it was for me to create something that combined the two together. In this case, it’s in the form of cake. A strong, fudgy, ever-so-chocolately cake, filled with layers of creamy, mouth-watering peanut butter buttercream. I just want to type that again: peanut butter buttercream. How can it not taste good when the title alone repeats the word “butter’” twice? Butter, by the way would probably come third on my list.
If Reese’s peanut butter cups were a cake, this cake would be it. So if you’re a fan, it’s time to get baking. Even if you’re not a fan of peanut butter, I can’t possibly imagine how you couldn’t enjoy eating every last spoonful of this buttercream, I’m telling you – it’s good. BUT, if you’re allergic to nuts, or are you can’t bring yourself to eating peanut butter, you can fill this cake with any buttercream you like.
This chocolate cake is an adapted version of this cake (from the one and only, Joy the Baker) that I made for a wedding, and is made using a 7 inch (18cm) round cake tin. If you don’t have a 7 inch cake tin, this post explains how to adapt recipes for any round size cake tin that you have at home.
For the perfect texture, you will need to ensure that you do a few things:
- You need to use brown sugar (as well as white sugar). It doesn’t need to be soft brown sugar, but does need to be brown to help give a fudgy, caramalised texture and flavour.
- Make sure you cream your butter and sugar extremely well to ensure a light and fluffy cake. Failing to do so will result in a dense cake. Find out how to cream butter and sugar successfully here.
- Be careful not to over mix. Alternating the flour mixture with the buttermilk helps to prevent too much gluten from forming (remember, gluten forms when the proteins in flour meet water).
- You’ll notice that all measurements in the cake recipe use grams without the cup equivalents. This is because the weight measurements do not convert to exact cup measurements. Be sure you have your scales handy!
…and the coffee in the cake is there to increase the acidity of the cake (which helps it to set faster) and to enhance the chocolate flavour. You can’t taste the coffee at all, but if you’d like to taste it, just add more 🙂
(By the way, do you like the photos? They are taken by my lovely and talented friend, Andrea Krawchuk)
Don’t use natural peanut butter
So you know how I mentioned that I like my peanut butter in it’s purest form? Well, unfortunately it’s not the best kind to use when making peanut butter buttercream. Natural peanut butter is a little too grainy for buttercream and we need one that is super creamy, not crunchy and one that combines easily with the other buttercream ingredients. Thus, it’s best to use Kraft, Tescoes, Jif (etc.) peanut butter. It hurts to type that.
I hope you enjoy baking this cake. Next time I make it I think I’m going to drizzle a little caramel sauce on top with a few chopped up Snickers bars…
YOU MIGHT BE INTERESTED IN
![]()